|
|


|
 Fitting a Single Turbo Fitting a Single Turbo
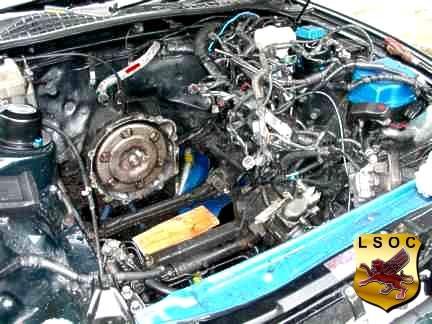
This tutorial will walk you the through the conversion of a Soarer twin turbo engine to a larger single turbo operation, using a Boostlogic and Vortex Single Turbo Kit. The kit was designed for installation in a MkIV Toyota Supra, but as you'll see below it can be modified to fit a Soarer.
First of all turbo removal. Since this has been well documented before I suggest you use Jake Purches's site for the removal of the turbos, as it has been done very clearly. I hope Jake, the writer of the the removal info won't mind. Thanks in Advance.
Ok once you have removed the turbos from the car, the next step is to block off or loop some water pipes.
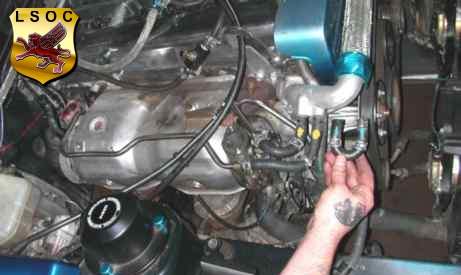
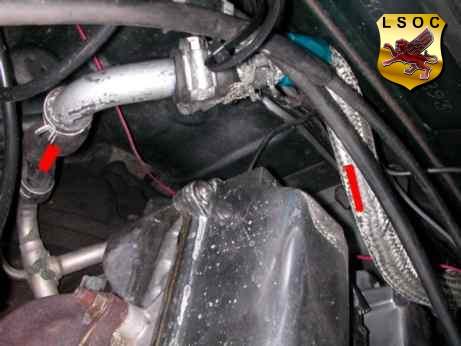
In the picture above, the pipes marked in yellow will be no longer needed as you will have removed them with the turbos. They are water pipes, so you need to loop them back onto themselves. Just use a “U” shaped pipe and loop them back onto each other so that the pipes marked with YELLOW will be gone and PUT PIPES MARKED IN BLUE in place, as shown below.
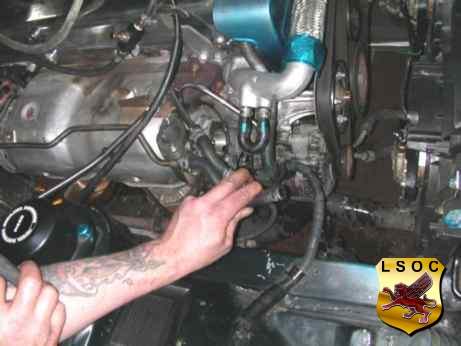
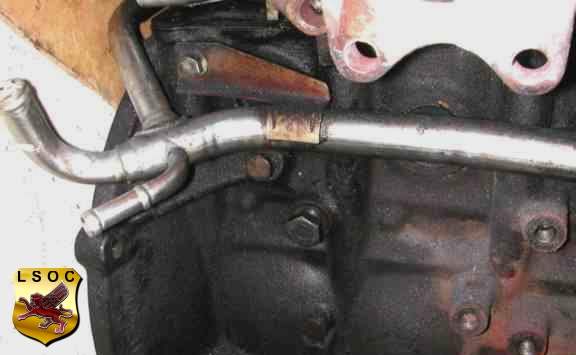
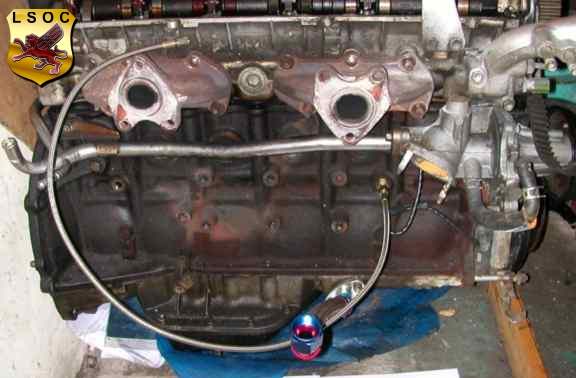
Now you will see a long metal pipe running along the length of the block from front to rear.
I have marked it in BLUE in the picture above. This is running of the water pump..follow it along to the rear end.
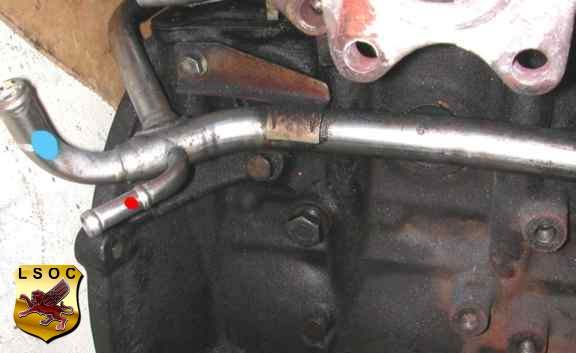
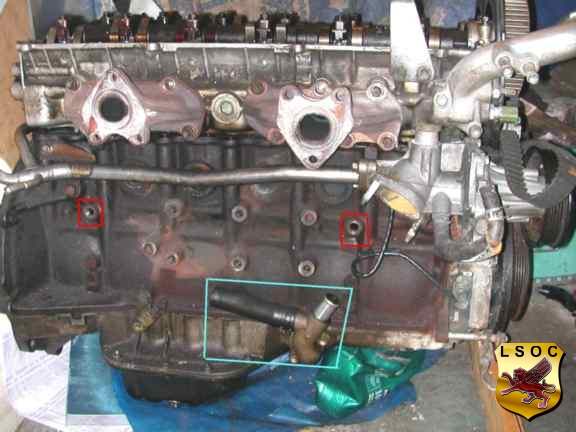
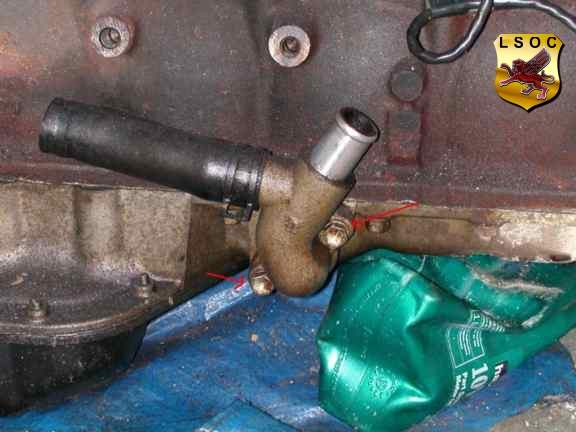
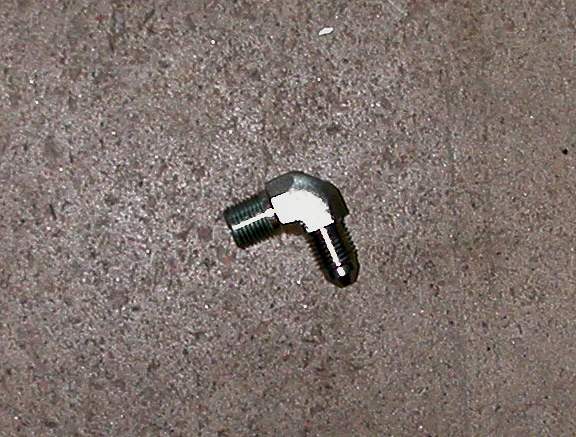
Above I have marked the feed to the heater matrix in BLUE. The one marked in RED you need to BLOCK OFF (it was the water feed for the old turbos). We used a bolt with some PTFE taped round the threads and made sure it was a tight fit and put a jubilee clip round it. It works fine. With the pipe marked in BLUE you need to have a bit of hose, or copper pipe so you can join or loop a new pipe
over to the hose on the top heater matrix pipe on the bulkhead of the car.
I have marked the heater matrix pipe in RED in the picture above. We just used a bit of pipe to join the 2 hoses's together.
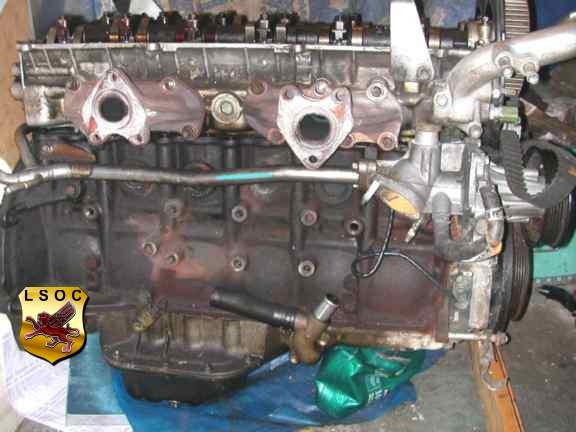
Ok now you only have one more water pipe to deal with and that is on the side of the water pump. You can see the rubber pipe marked in RED. Just use a bolt again with some PTFE tape on the threads and insert it into the pipe and jubilee clip it as well.

Now thats all the water pipes done. OK, when you removed the turbos you would have been left with the oil hardpipes attached to the car. You need to remove them. Nothing to hard. Remove the 2 bolts holding the feeds on and remove the oil return pipe along with them. When removing the oil feeds from the car there are 2 copper crush washers on each bolt. Either get new ones or make sure the old ones are cleaned well.

I have marked the oil pipes in the picture above. OIL FEEDS marked in RED...OIL RETURNS marked in BLUE...and the OIL FEED BOLTS marked in GREEN...Ok once you have them off lets start with the install...
We will use pics taken on an old engine we have spare, as it will be clearer to follow (we hope!).
Here we go.
In the picture below I have marked out the oil feeds in RED. The oil feed to the LEFT in the PIC will be blocked off with the bolt supplied in the kit plus one of the new or old crush washers. The oil feed to the RIGHT we will use for the NEW Turbo oil feed.
The OIL RETURN FLANGE at the bottom of the picture is marked in BLUE. You need to remove this flange as we will be putting a new one on using the supplied parts in the kit.
Remove the oil return flange shown below. Undo the 2 bolts marked in RED.
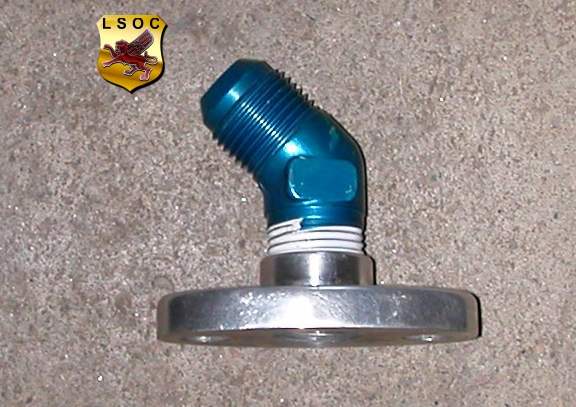
Now get the new return flange and the new BLUE AEROQUIP return connection and bolt them onto the engine using some PTFE tape on the BLUE AEROQUIP connection.

Ok now get the BLANKING BOLT that came with the kit.
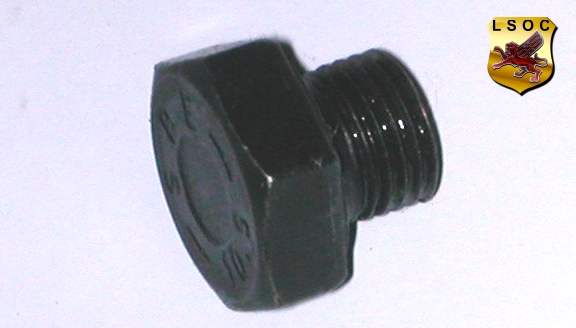
And using one of the new or old crush washers insert this into the REAR OIL FEED.
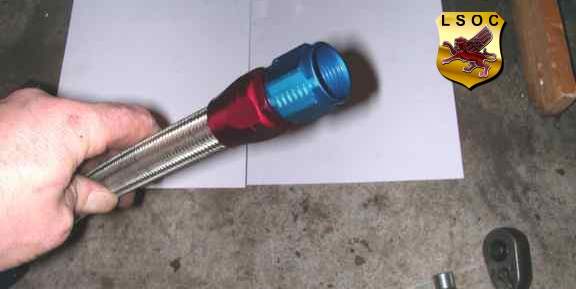
Ok now get the new oil RETURN PIPE that came with the kit...
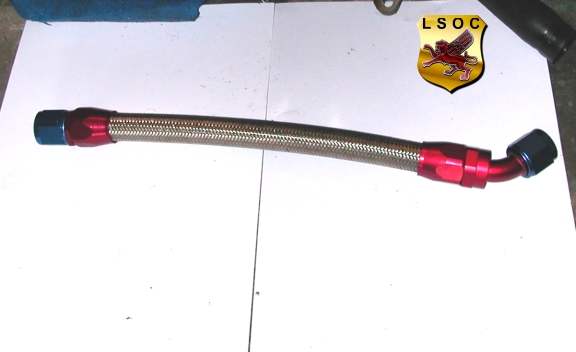
...and fit it onto the oil return flange you have just put on. Do not tighten it up too tight for now as you might need to move it's angle a little. Put the STRAIGHT END onto the oil return flange not the angled end, which will unltimately go to the turbo.
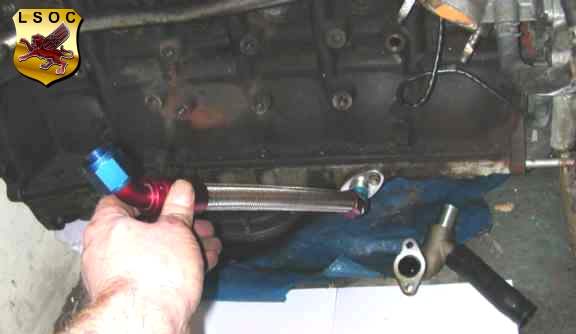
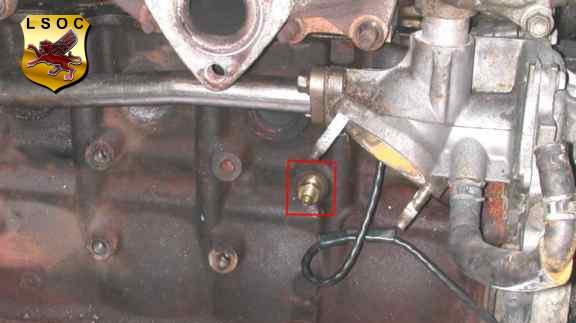
Ok now onto the oil FEED, get the supplied nipple for the oil feed pipe...
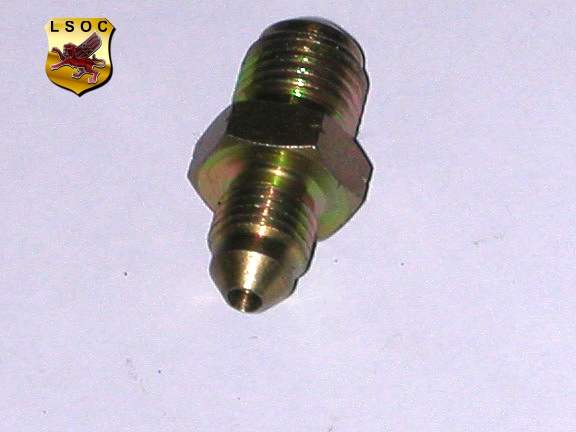
...and screw it into the oil feed hole on the side of the block.
Then get the new oil FEED pipe...
...and fit one end onto the nipple on the engine.
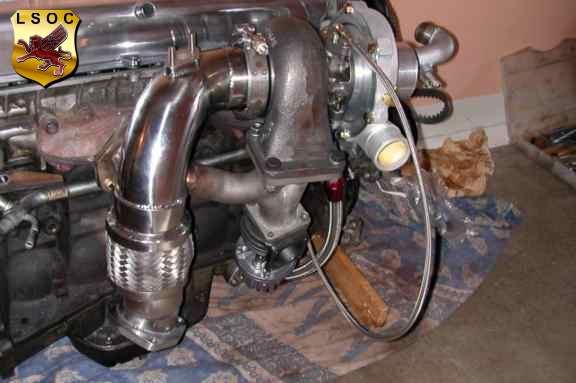
Ok now you have the oil pipes and the water pipes all dealt with, it's time to set about doing the supplied manifold, wastegate and the turbo. But before we go any further lets have a look at the manifold that is supplied. If you look inside the pipes of the new manifold you will see where the weld has penetrated through to the inside of the pipe. Ours wasnt too bad but we decided that we would just buff the inside weld down a bit so that it would not interfere with the flow of the exhaust gasses. If you decide to do this then a dremel with a remote end on it will do it fine. Be careful NOT to buff these welds down too much as it will weaken them and might cause the weld to fracture under the extreme temperatures that it deals with.
OK now thats taken care of lets deal with the wastegate, manifold, and turbo.
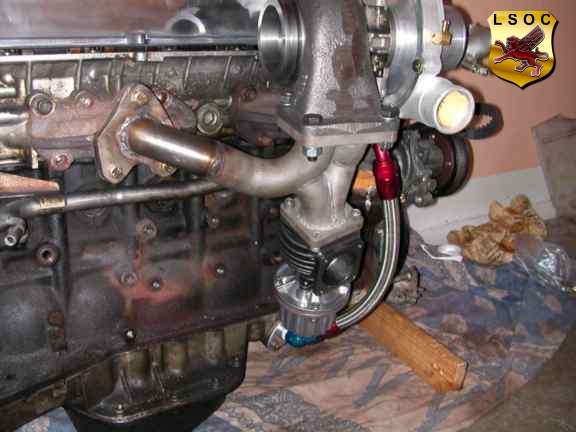
We fitted the manifold onto the car first, without fitting the wastegate onto the bottom of the manifold. I would say you would be better to fit the wastegate to the manifold BEFORE fitting the Manifold onto the OEM manifolds of the car. The reason being, the wastegate is attached to the bottom of the supplied budget manifold and is attached to it by 4 studs which come with the kit. If you try to fit the wastegate onto the bottom of the manifold with the studs in place on the wastegate there is not enough room to slide the wastegate into place. So fit the 4 studs supplied with the kit onto the wastegate. The flared flange in the wastegate kit and the flared bit goes to the inside of the wastegate. Then fit the gasket and bolt it onto the manifold bottom like you see in the picture below. Just move the power steering pipes over a little so they dont get fouled by the wastegate.
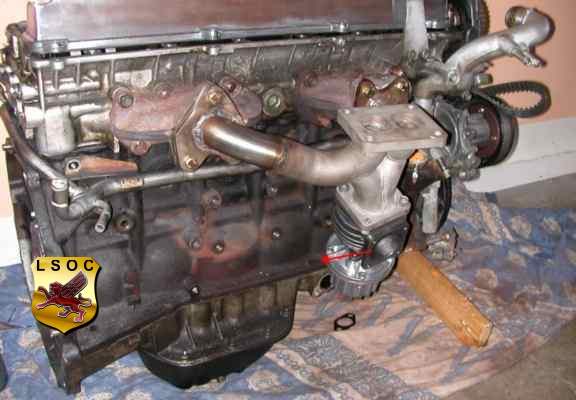
As you will see in the picture above there is a RED arrow. You need the wastegate flange turned round to face the rear of the engine so that you can fit the screamer pipe onto it later (one other thing, there are 2 brass nipples that have to be fitted onto the side and top of the wastegate. There is a slight problem in that the nipples are imperial and the holes in the wstegate are metric. The nipple will fit but they are VERY tight so be VERY careful fitting these into the wastegate. Do NOT over tighten them).
OK now you can bolt the manifold up onto the OEM ones with the supplied bolts and washers.
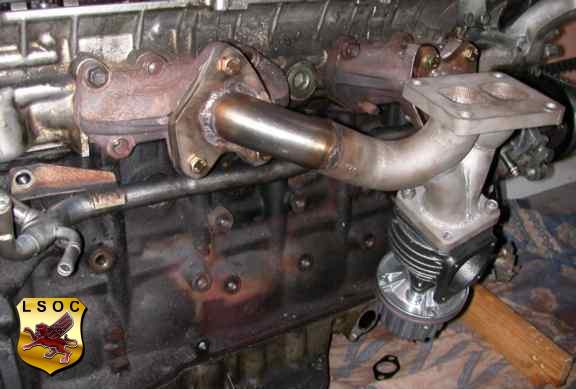
Don't worry about how our manifold looks in the picture above. We were the testbed so we had to have it all altered it WONT look like that when you get yours (and neither does ours look like that any more as we cleaned it all up!).
Ok now onto the turbo itself. There are 4 bolts supplied with the kit to secure the turbo onto the top flange. One of them is a little smaller than the others so keep a look out for it, as it is used on the top left rear bolt hole on the turbo flange. And that will have to be inserted from the bottom upwards. The other 3 can be put in from the top. So get the square gasket and the brass nipple for the turbo snail and fit the turbo onto the top of the manifold. Then fit the nipple into the snail housing. Being careful not to tighten it to much.
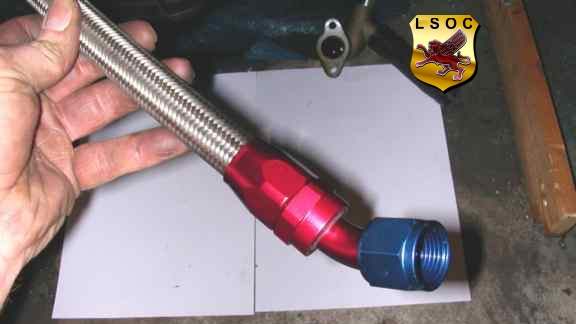
Now you have the turbo fitted get the other flange and AEROQUIP connection the other blue one, as shown below.
Bolt the flange above onto the BOTTOM of the turbo with the bolts supplied and then using some PTFE tape screw the other BLUE AEROQUIP connection into that flange. You can do this BEFORE you fit the turbo to the manifold if you like. In fact it's probably better to do it that way.
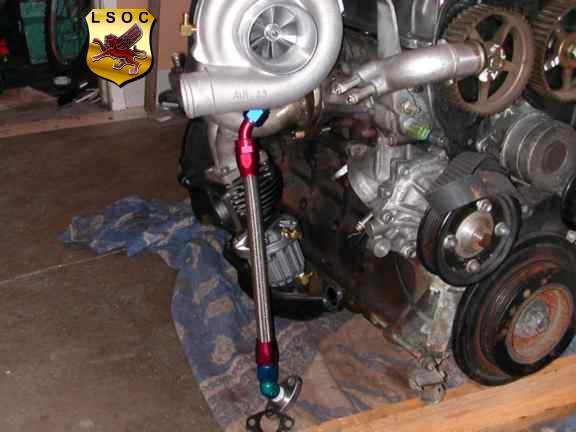
Connect the other end of the oil RETURN PIPE to the other flange.
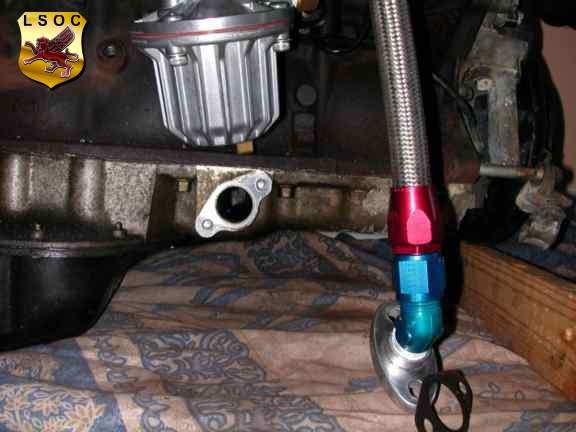
Using the old gasket you kept from the old hardpipes, connect it onto the bottom of the engine as shown in the picture below.
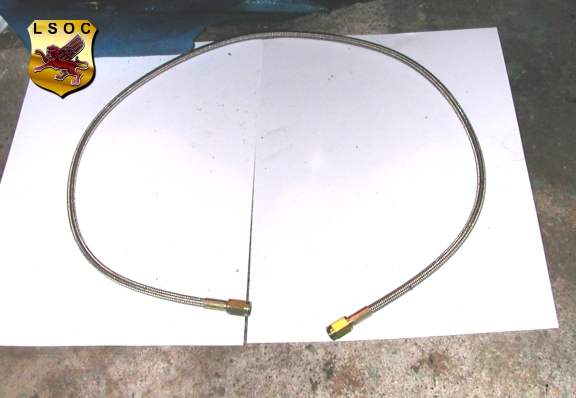
Now we need to get the supplied nipple for the turbo side of the high pressure line...Now we need to get the supplied nipple for the turbo side of the high pressure line so get that nipple..
...and again using some PTFE tape screw it into the top of the turbo housing, and connect up the high pressure line. Do NOT tighten this pipe up yet as you are going to prime the turbo. We are just making sure everything is going to sit right.
Now onto the screamer pipe. We had some problems with this as the Supra engine sits more forward in the engine bay than the soarer engine does. So we had to extend this pipe a little. You wont need to as the suppliers should have the right settings for the Soarer by now.
There are 4 Allen screw bolts and a gasket. Using these, bolt the screamer pipe onto the side of the wastegate. That's it done.
You also get a new downpipe section with this kit. It is held in place with a V clamp.
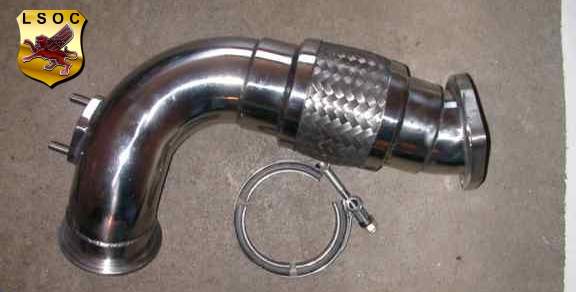
Fix the downpipe onto the rear of the turbo housing.
Have your local exhaust specialist match it up to your own downpipe. Nothing to hard or expensive to do there. It's a 3" flange on the end of the supplied downpipe so best to let them know that in advance.
Now onto the Intercooler pipes. You are supplied with a 90% angled silicone hose, as the Supra setup is a little different. Once again this is due to the engine being more forward in the bay. We cannot use the metal one supplied to them so the suppliers will change this to a 90% silicone hose which works fine. And then all you need do is get you intercooler pipe on fit the air intake pipe at the front of the turbo and the air filter supplied. And your nearly done.
There are 2 small filters supplied with the kit and they fit onto the left side of the rocker cover and the rear of the plenium chamber where the air pipes are no longer used. Make sure you push these home properly and tighten them down.
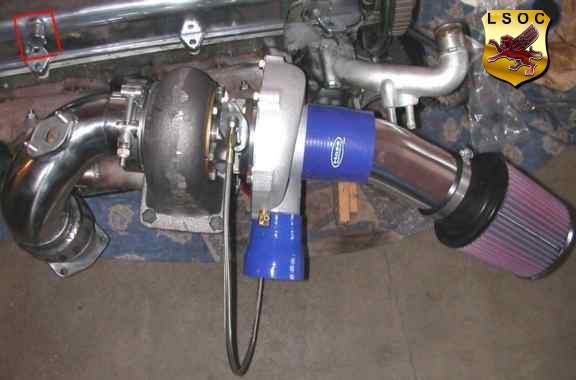
The O2 sensor has to be moved a little as it is now going to sit ontop of the new downpipe. Just cut the wires on the sensor side and slice in a length of wire so you can extend it a little (make sure you mark the wires BEFORE cutting as 2 of them are black).
Once you have your own downpipe matched up do NOT start the car untill you have primed the turbo. Take off the FEED pipe on the top of the turbo and the little nipple and get a very small filler and some NEW oil and pour this into the top of the turbo housing spinning the front wheel as you do..so that the turbo is taking down the oil. Once this is done, refit the nipple and the feed pipe nice and tight. Then unplug the coil packs so the car wont start, and turn the car over for a minute or so, allowing the oil pressure to build up. Refit the connections to the coil pack (if you have been smart you will have changed the oil and filter before you started all this), then fire the car up. Give it a few days to bed in and enjoy your totally different car before putting it through it's paces.
I hope this walkthrough isn't missing anything if anyone needs any help you can send me a private message through the club forum. The suppliers are VERY helpful and nice lads too.
Good Luck!
Andy (Bedlam) - Glasgow, Scotland. 12th July 2005
©The Lexus Soarer Owners Club
|
|
|
|
|